


This chocolate peanut butter buckeye candy recipe is the ultimate Christmas candy! I make these every year to give to friends and they travel well. Learn how easy it is to make these and you can start a new candy tradition today. I love making candy for Christmas. One of my favorites is the chocolate …
Recipes

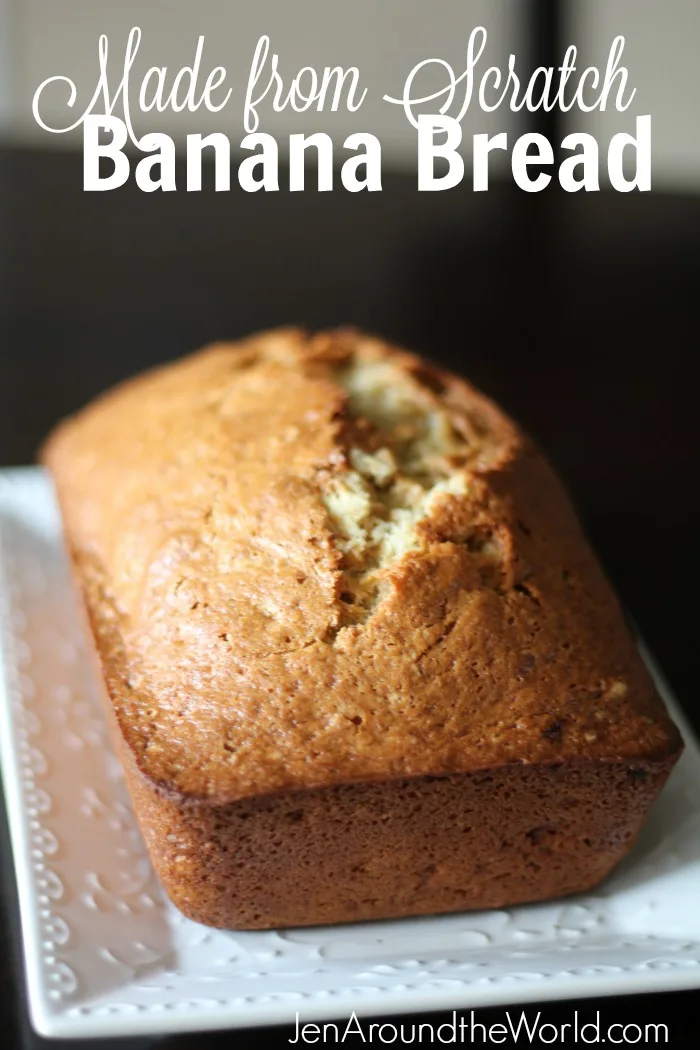
Banana Bread is one of those delicious desserts that can be made at a moment’s notice and is perfect with a cup of hot tea or coffee. The next time you are in a pinch, look up this recipe and make a batch! When my kids were little, one of my favorite recipes to make …


Learn how to make eel sauce for sushi and you will never go back to buying store-bought salty sauce again. Now, this is not like my homemade teriyaki sauce, which is delicious. This sauce has a very unique flavor. I’m starting this Sushi series by teaching you how easy it is to make a simple …


Making chocolate-covered strawberries are simple and easy and great for the newbie cook who wants to impress their significant other. One of the easiest desserts on the planet is Chocolate Covered Strawberries for Valentine’s Day. We love making these because of how simple they are — and you can make them taste different using the …

Old Fashioned Sage Cornbread Dressing is a true Southern tradition to serve during Thanksgiving dinner or Christmas dinner. My momma used to make this family recipe for the holiday season and now I am sharing it as well. I did it — I finally did it. I mastered Southern cornbread dressing! I’m so excited! I …
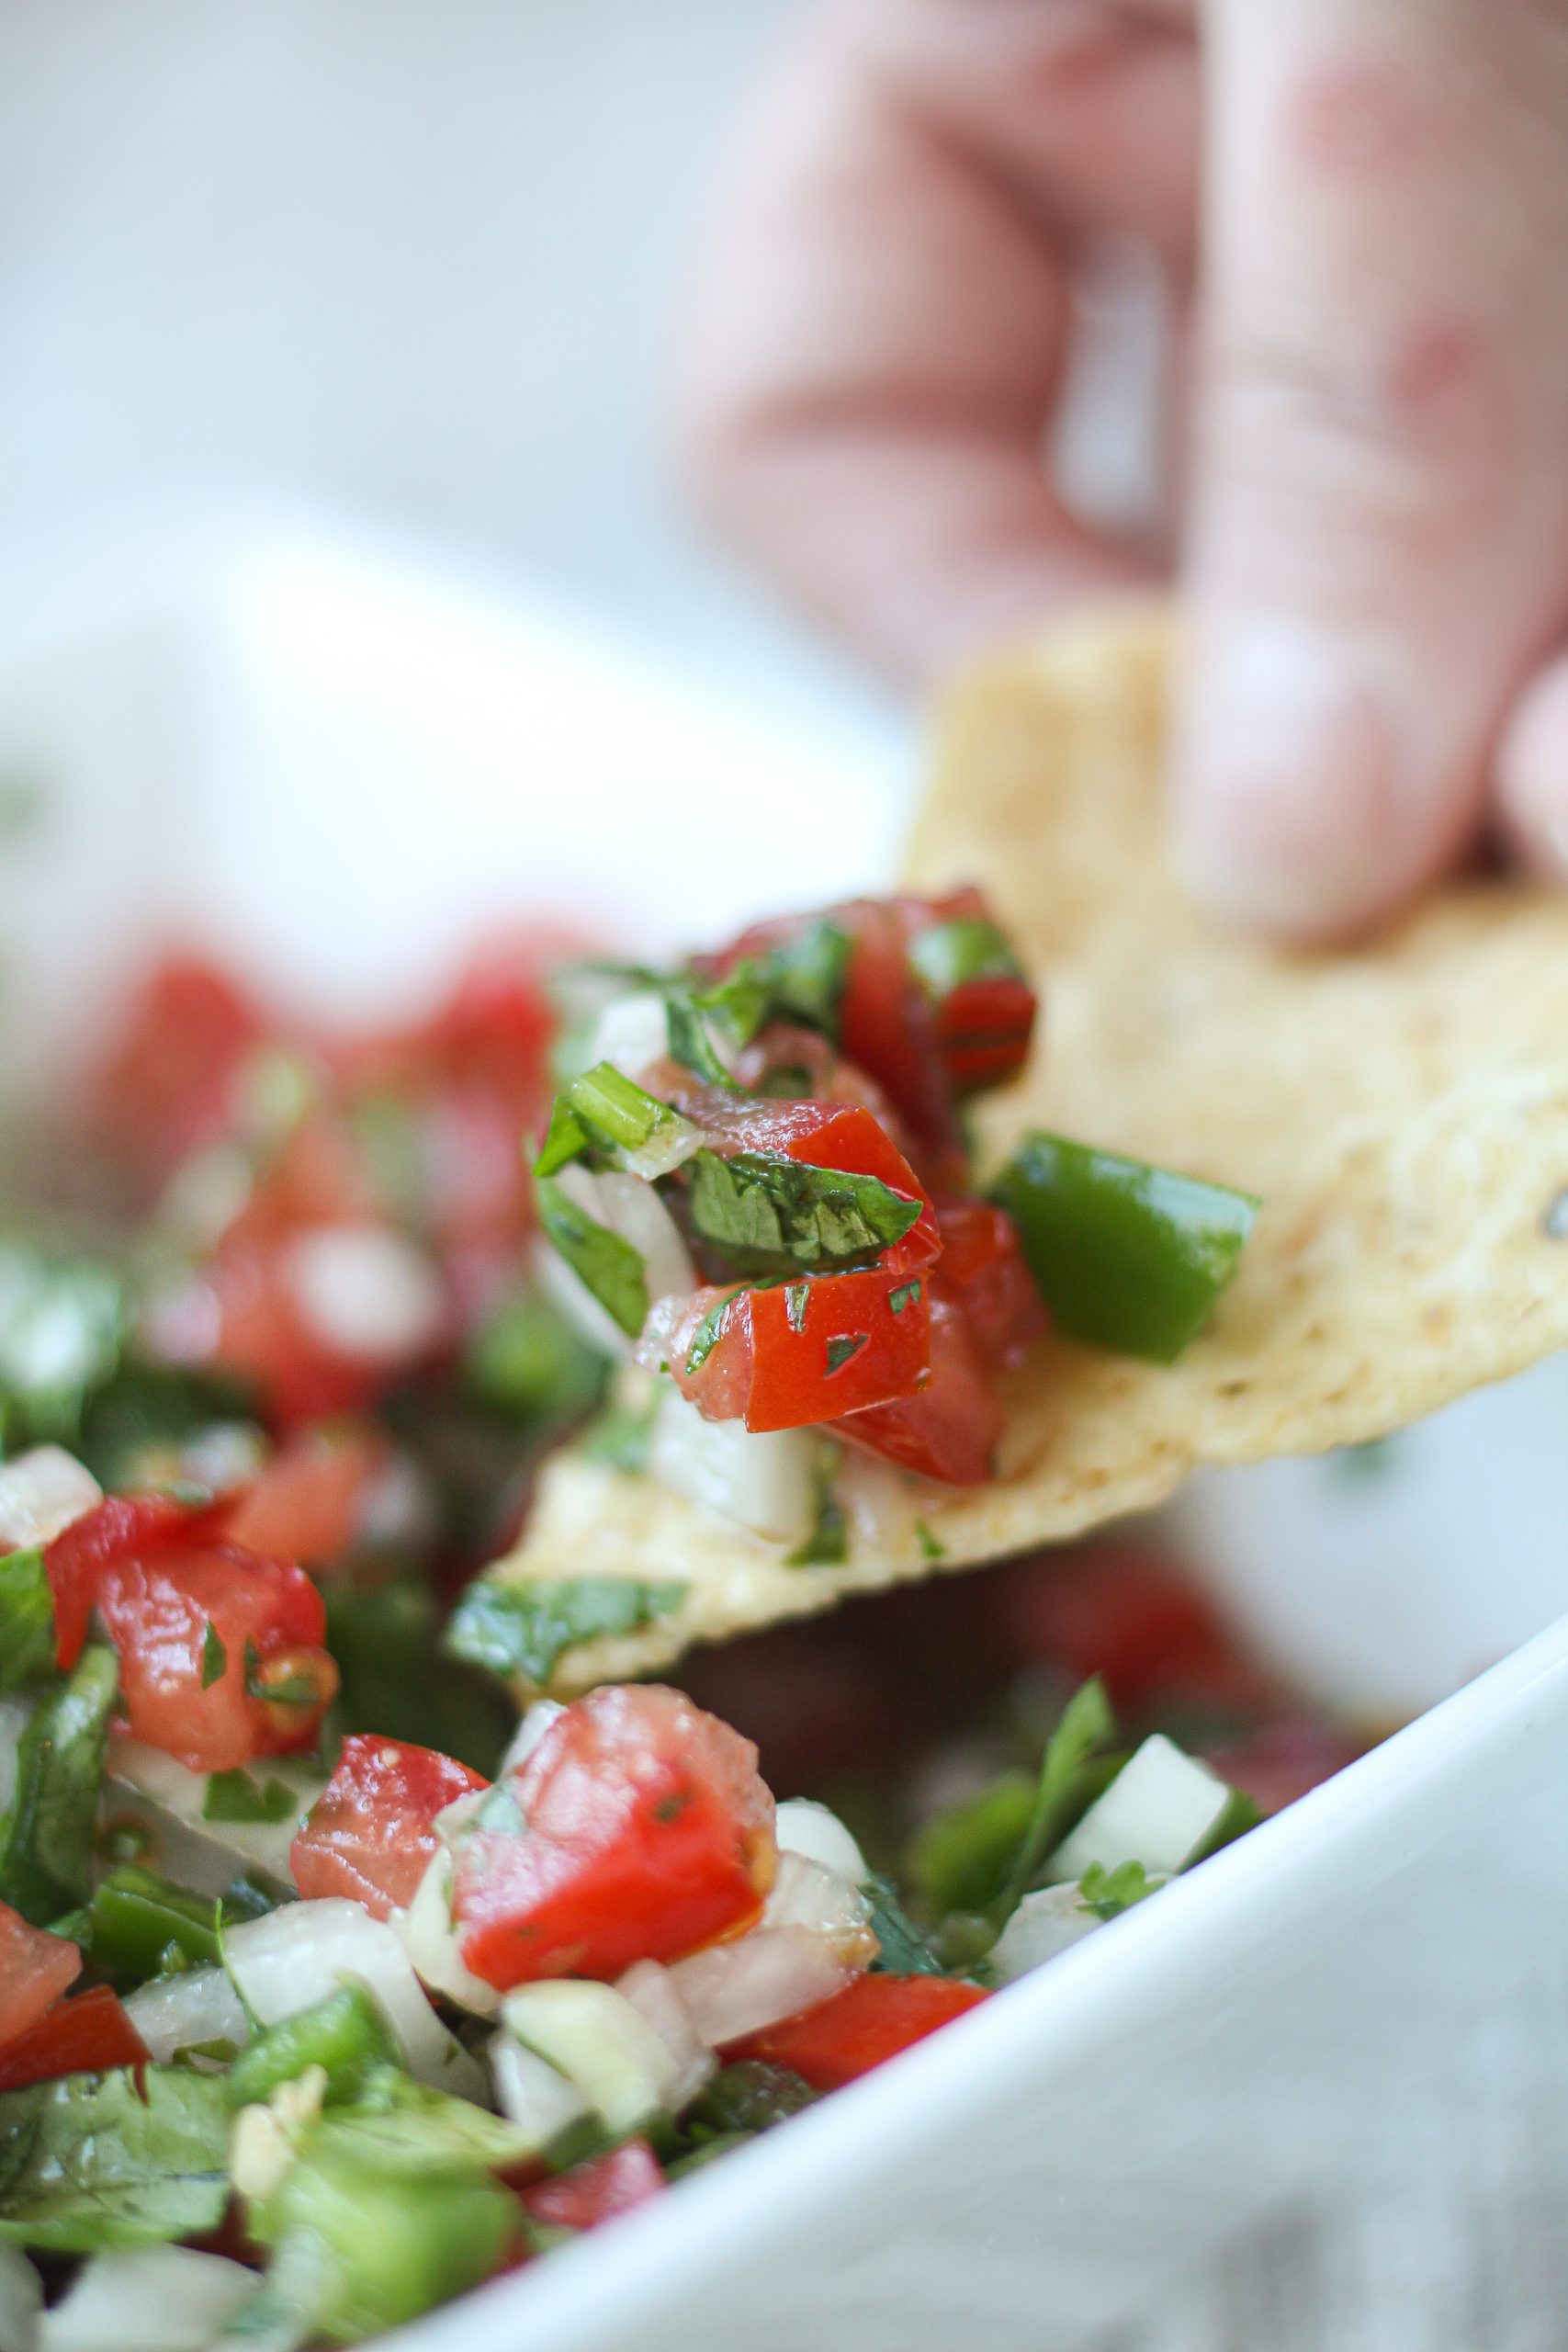

Making a delicious Pico de Gallo to on top of dishes like tacos, burritos, and grilled chicken is simple and easy. This condiment will soon become your very favorite. If you go to a Mexican restaurant, the best side item you can get besides a side of Restaurant Style Mexican Cheese Dip is Pico de …
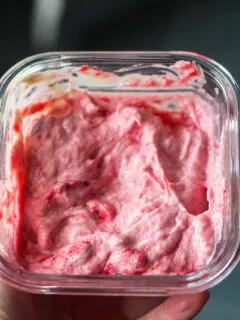
Cranberry Mayonnaise is so simple to make and will light up those Thanksgiving leftovers. Here’s how to take your regular mayo up a notch. This time of year, my refrigerator is FULL of Thanksgiving leftovers. In fact, the leftovers started a few days ago. We brought home smoked turkey and cranberry sauce left over from …


These Orange Rosemary Cornish Hens will make the perfect Valentine’s Day dinner. They are perfect for a romantic budget-friendly dinner for two. Every year, I try to plan the perfect romantic dinner for two from home. I have so many great ideas, but this year, I decided to treat my husband to a delicious dinner …


This Copycat Sonic Lemonberry Slush is spot on to your favorite slushie at Sonic. Learn how easy it is to make right in the comfort of your own home. Kayla and I love visiting happy hour at Sonic. When we lived in Hopkinsville, we were only two minutes from the Sonic. But now? We live …
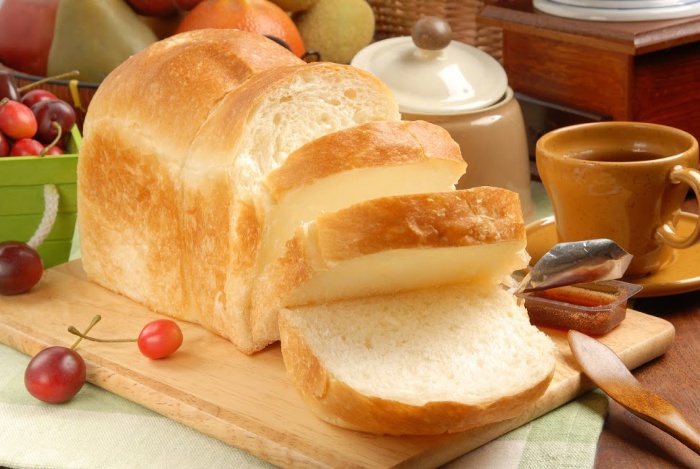
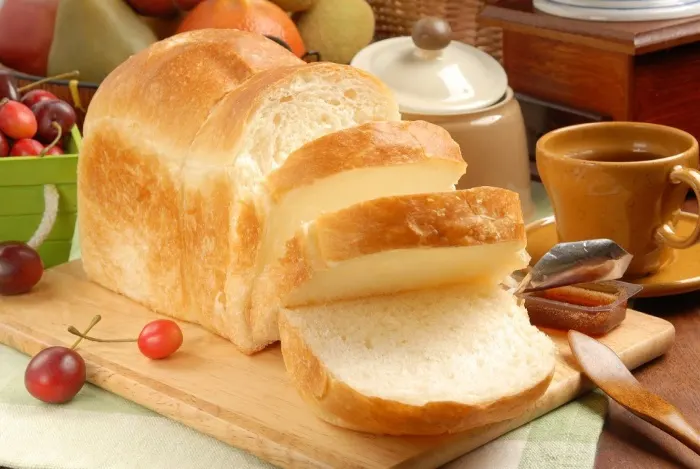
Making homemade sandwich bread is simple and easy. If you cannot find any at the store, no worries! Here is my easy recipe and tips. You will be making bread before you know it. Since the stores are being so ransacked right now, I am doing my best to show you how to make pantry …
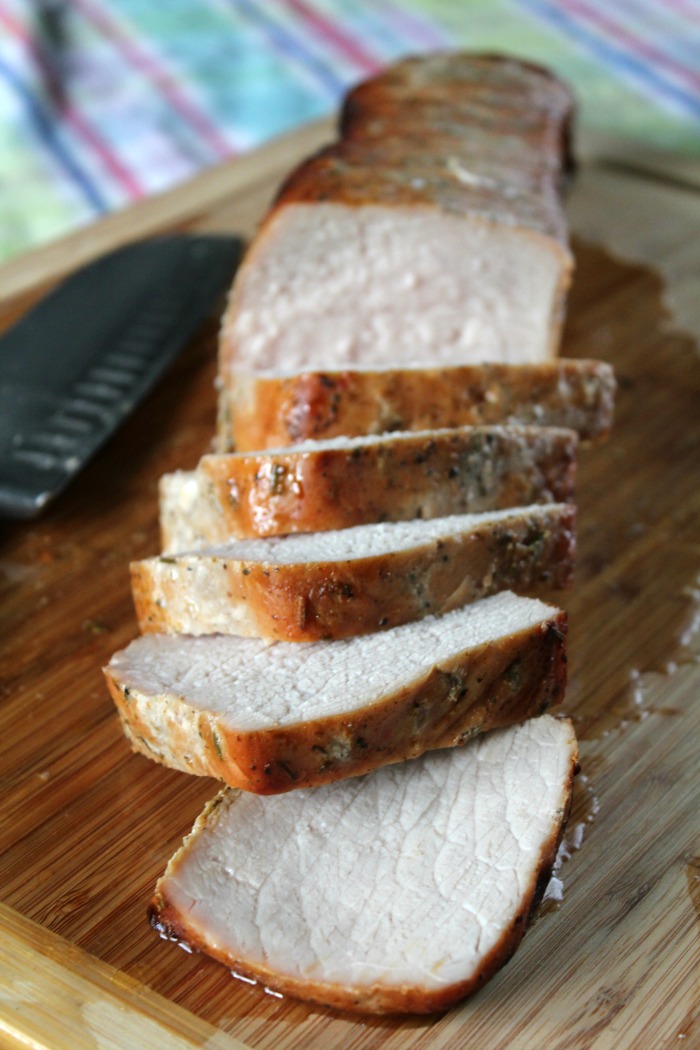
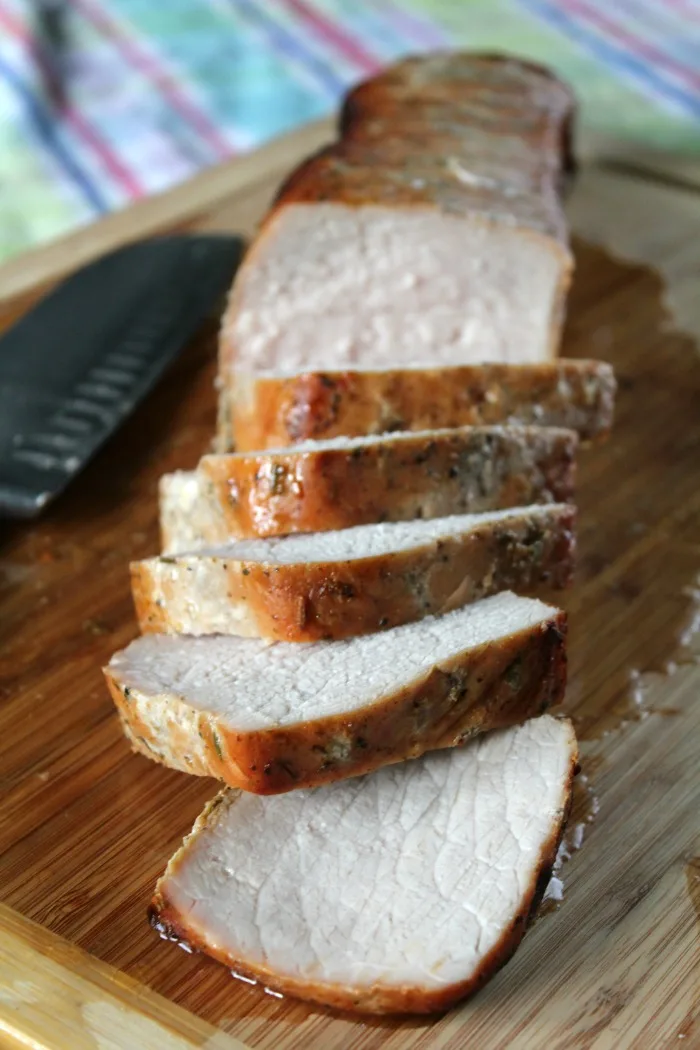
This Garlic and Herb Pork Loin is a simple and easy meal when paired with my Parmesan Fried Potatoes. Make this for dinner tonight and wow your family. During the hot summer months, we love getting outside on the grill to cook. Not only does this allow us to create delicious recipes like my Grilled …
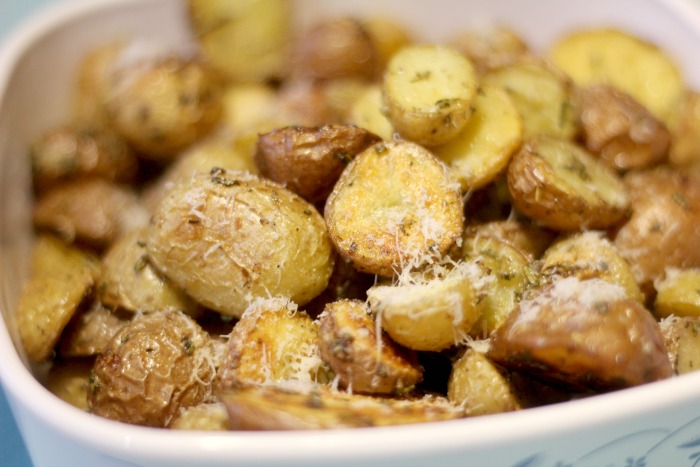

This recipe for Parmesean Rosemary Roasted Potatoes is super easy and will make the perfect side dish to any meal you have going on. Anytime I am at the grocery store, I love buying those little new potatoes that you can get in the bag. They make the perfect side dish when roasted with fresh …


My recipe for bacon jam is one that has quickly become a favorite around here. Served over Al Fresco Sweet Apple Chicken Sausages for the perfect bite of deliciousness. I received complimentary coupons from Al Fresco in exchange for this post. Anyone who knows me knows my love of all things bacon-related. So WHY did …


This summer berry fruit parfait is the perfect way to start a summer day! A couple of months ago, when I visited Harrodsburg KY and stayed at the gorgeous Coleman House Bed and Breakfast, Cala served up an amazing Summer Berry Fruit Parfait for breakfast as a starter. As I was exclaiming how delicious it …


I have been loving finding new meals to make where I only mess up one or two dishes. That is how this new recipe for Sheet Pan Steak Fajitas came about.

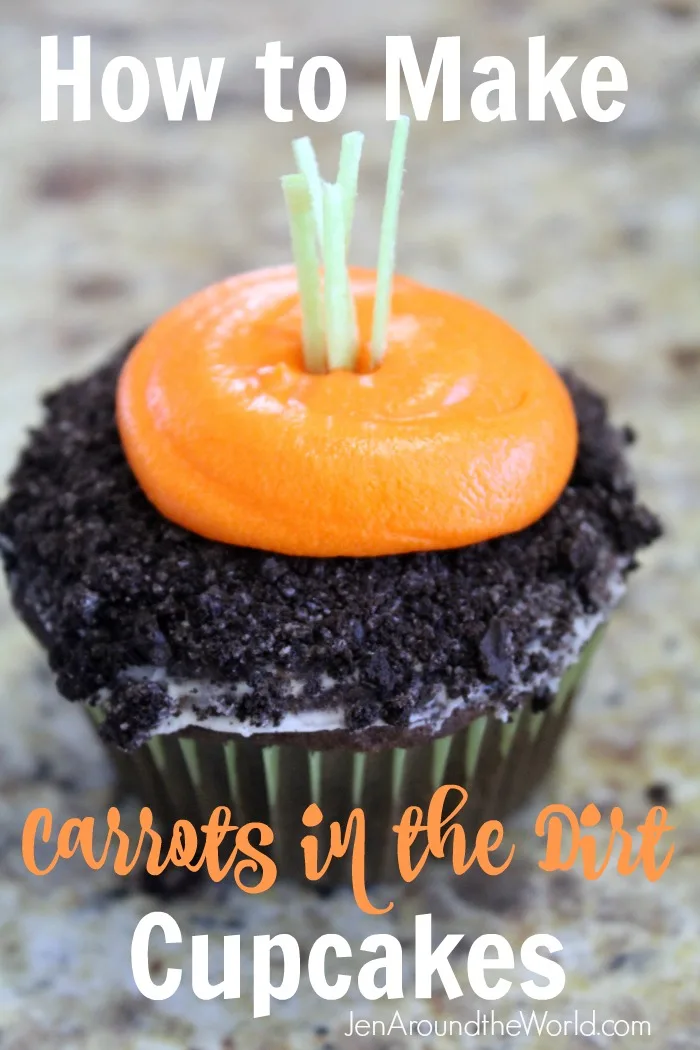
Last week I shared with you my Bunny Butt Cupcakes to make for your Easter gathering. Today, I have another fun cupcake to share with you that is equally as easy and makes the perfect pairing to go with those bunny butt cupcakes. How about a Carrots in the Dirt cupcake? This cupcake is super …


Recently while on Facebook, I saw a Delish video for Chicken Tamale Pie, and y’all — from that very moment, all I could think about was this dish. My mouth watered and I could literally taste every bite. I set out that afternoon to make this dish and of course, tweak it to be my …
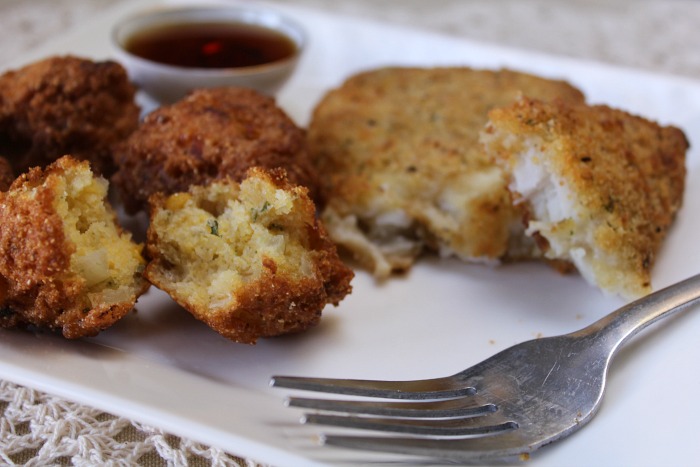
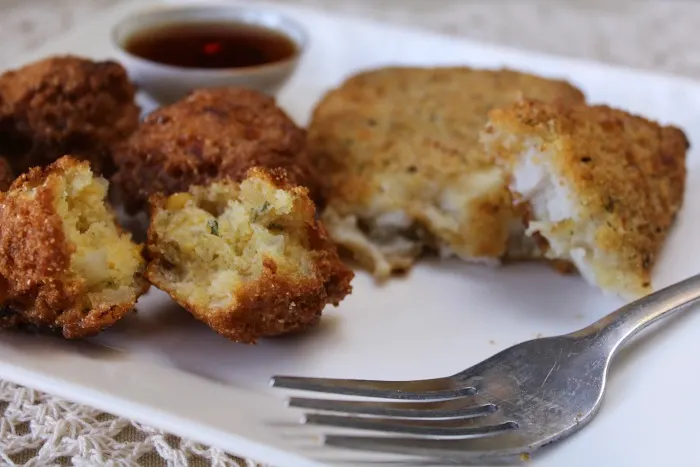
This post and recipe for Quick and Easy Hush Puppies have been sponsored by Gorton’s. All opinions are 100% my own. I will be honest — I am not much of a seafood person. I don’t eat salmon, can’t swallow an Oyster or clam to save my life — or any type of fish that …
Today I am sharing my top 10 recipes of 2015 with you. 2015 was a great year on the blog with food. My daughter honed in on her photography skills and we started making really beautiful meals. They were so gorgeous, even I was impressed and caught myself a couple of times running across them …


One of my favorite snacks are these delicious homemade cheese crackers. They taste better than any cheese cracker you can get at the store. And the best part is you know exactly what is in these crackers!


This shop has been compensated by Collective Bias, Inc. and its advertiser. All opinions are mine alone. #PourMoreFun #CollectiveBias Earlier this week while at Walmart shopping for groceries, I attended a demo for Kool-Aid’s new Easy Mix flavors in Grape, Cherry, and Tropical Punch. The flavors tasted so good to me, that I purchased 3 …


Making your own sushi rice at home is simple and easy. This step by step recipe will have you on the way to make delicious sushi recipes at home. Yesterday I showed you how easy it was to make Eel Sauce from scratch. Today — I am going to show you how you can make …


I discovered this recipe for Slow Cooker Honey Sesame Chicken while browsing Pinterest the other day. It is simply TO die for so I thought I would share the recipe with you. For Christmas, I bought myself a DSLR camera because I wanted to update my food blogging to better photos. My daughter has taken …
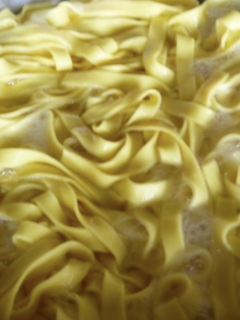

An easy recipe on how to make homemade pasta from scratch. When my husband and kids purchased a Kitchenaid Stand Mixer for me for Christmas one year, I knew I was going to want all of the attachments that come along with it. For years, I have wanted to make homemade pasta, and so just …


Back in May, when I catered my first wedding, I made a dish that I had never made before. It was one that the bride requested — and I was really unsure of how it was going to taste, but I did it anyway — and it is now one of my most requested items …
The other night when I fixed a delicious Mexican meal for my family, I was in the mood for some rice. I didn’t want just plain rice — I wanted something that had flavor and I think I discovered it when I found a recipe on Martha Stewart’s website for Cilantro Lime Rice. OH MY …
I made a new pie this year for Christmas and was totally excited that it actually came out extremely delicious! 🙂 Stephen was craving a Coconut Cream pie and even though I had never made one before, I was pretty sure that it would come out looking good, and hopefully tasting just as good.
Over the week with all the Thanksgiving festivities going on, I decided to make an old Southern favorite that I haven’t made in a while — Chess Pie! I’ve made a Chocolate Chess Pie before and shared it on here, but never shared with you my delicious Chess Pie recipe.
I have been baking like a mad woman today — 3 pies (one of which I am sharing with you today — Chocolate Pecan Pie), sweet potatoes, one of my two turkeys, eggs for all kinds of things, cornbread for dressing — and the list just keeps going! AHHH! 🙂 My sanity will return sometime …
If you want a delicious and decadent chocolate cake, you have GOT to try Paula Deen’s Chocolate Sheet Cake. So far, there is not one recipe of hers that I have fixed that is not flavorful or scrumptious. This cake is no exception.