
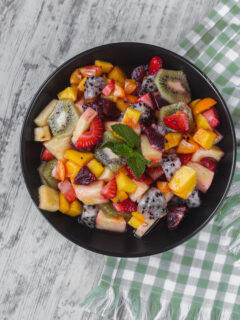

This tropical fruit salad with honey-lime dressing is the perfect Spring side dish for any get-together. Made with all tropical fruits and then topped with a tangy and sweet dressing. Sub out any of the fruits for your favorites. Welcome to #SpringSweetsWeek 2022 hosted by Heather from Hezzi-D’s Books and Cooks! Flowers are starting to bloom, the …
Spring

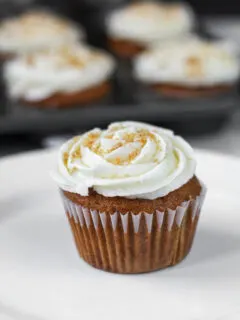
If you are looking for the best-tasting carrot cake cupcakes, you’re in the right place. These cupcakes are super moist and each bite is tender and fluffy. Top them with crushed ginger oat graham cookies and my homemade cream cheese frosting. Nothing can compare you to the first bite of these amazing cupcakes. I mean, …

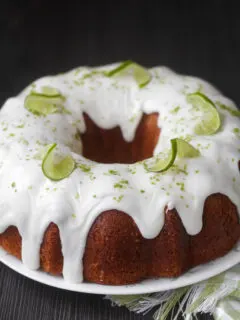
This Key Lime Bundt Cake screams Spring to me! Beautiful bright green colors and that amazing tart lime taste in a sweet bundt cake. It’s the perfect way to celebrate the first day of Spring. Welcome to #SpringSweetsWeek 2022 hosted by Heather from Hezzi-D’s Books and Cooks! Flowers are starting to bloom, the weather is getting …


These Strawberry Cheesecake Macarons are the perfect start to any Springtime dessert. Out of all the delicious macaron flavors I have made, these are the best ones so far! We love making french macarons to share with you! The outer shell has a beautiful pink color. The filling is my creamy homemade cream cheese buttercream and it has …